In this blog, we will learn how to interface LM35 and Arduino. Once we successfully interface Arduino and lm35, we will go on to build a temperature display using Arduino and a 16×2 LCD module that constantly monitors temperature around the measurement field/range of LM35 and displays the same on the LCD module.
Know How to interface Arduino and 7 Segment Display : Beginners Guide here.
So let’s get started.
LM35 is an analog, linear temperature sensor whose output voltage varies linearly with temperature. LM35 is three terminal linear temperature sensor and it can measure temperature from–55 to +150 degree celsius. The voltage output of the LM35 increases by 10mV per degree Celsius rise in temperature. LM35 can be operated from a 5V supply and the stand-by current is less than 60uA.
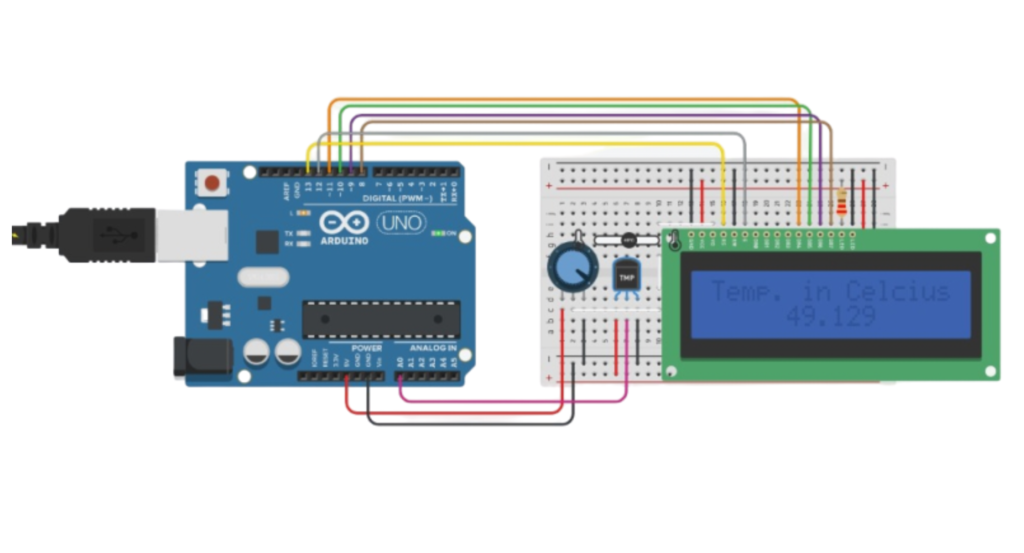
Circuit Diagram:

Steps:
- Connect LM35 to Arduino uno as shown in circuit diagram. The +5v for LM35 can be taken from the +5v out pin of arduino uno. Also the ground pin of LM35 can be connected to GND pin of arduino uno.
- Connect Vout (the analog out of LM35) to any of the analog input pin of arduino uno.
Check out How to Connect Arduino Uno to Android via Bluetooth here.
Temperature Display on 16×2 LCD Module:
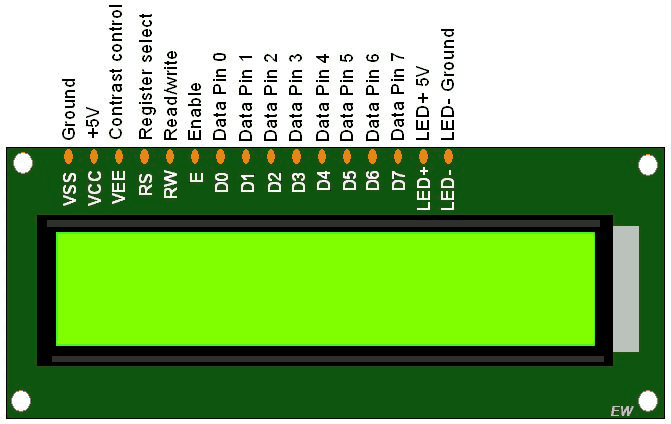
Now, lets connect 16×2 LCD display with LM35 and Arduino – interface and lets display the temperature values on this LCD display.

Also, you can refer above circuit for the connections.
Program:
#include
LiquidCrystal lcd(13, 12, 11, 10, 9, 8);
int sensor_Input;
float temp;
void setup() {
Serial.begin(9600);
lcd.begin(16, 2);
}
void loop() {
measure_Temp();
display_Temp();
}
void measure_Temp()
{
sensor_Input = analogRead(A0);
temp = (float)sensor_Input / 1024;
temp = temp * 5;
temp = temp – 0.5;
temp = temp * 100;
}
void display_Temp()
{
lcd.setCursor(0, 0);
Serial.print(“Temp. in Celcius: “);
Serial.print(temp);
Serial.println();
lcd.print(“Temp. in Celcius: “);
lcd.setCursor(5, 1);
lcd.print(temp);
delay(500);
}
Okay! so this is very basic and self explanatory code.
Some people would like to use 7 Segment display to display temperature measured using LM35 and Arduino. so in next blog I will explain, How to interface Arduino and 7 Segment Display.
You may interested in:
Capacitor: The beginner’s Guide
Introduction to Resistor: Beginner’s Guide