Introduction
Proximity sensors are revolutionizing industries with their ability to detect objects without physical contact. From robotics to automation, these sensors, when interfaced with microcontrollers, offer unmatched precision and control.
This guide walks you through the step-by-step process of proximity sensor interfacing with microcontrollers, ensuring you gain practical knowledge and unlock the full potential of these technologies. Let’s dive in!
1. What Is a Proximity Sensor?
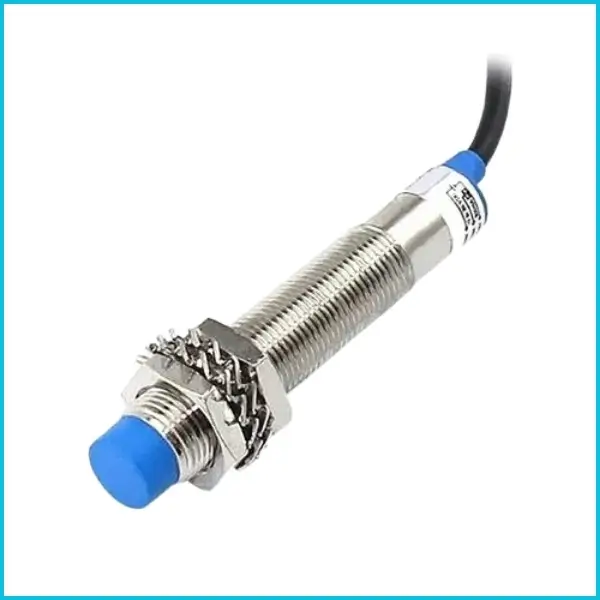
A proximity sensor is a device that detects the presence or absence of objects nearby without any physical contact. Depending on the technology used, they can detect metal, plastic, wood, or even humans.

Types of Proximity Sensors:
- Inductive: Best for metallic objects.
- Capacitive: Detects both metallic and non-metallic objects.
- Ultrasonic: Ideal for measuring distances.
- Optical: Uses light to sense objects.
2. How Proximity Sensors Work
Each sensor operates on unique principles:

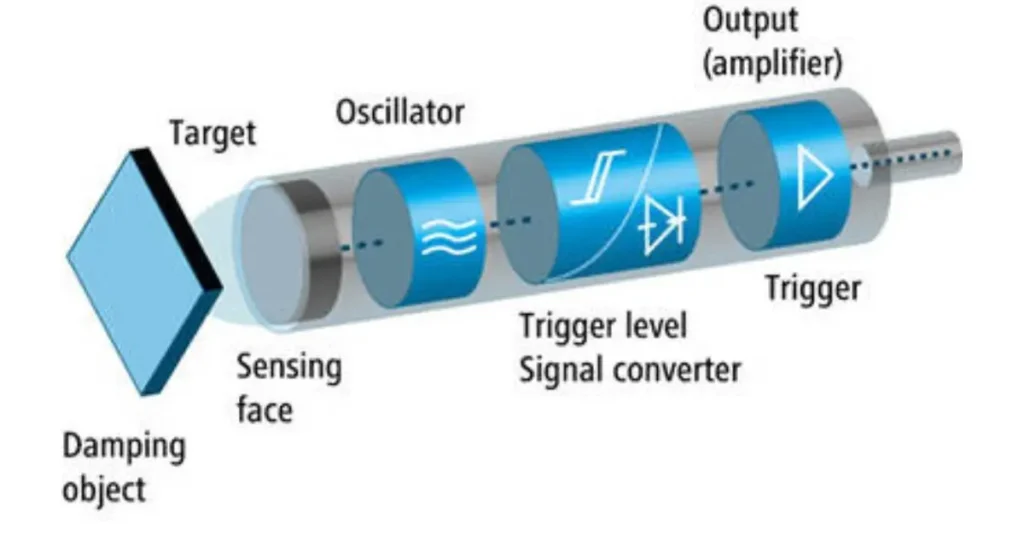
- Inductive Sensors: Generate magnetic fields to detect metal objects.
- Capacitive Sensors: Measure changes in capacitance.
- Ultrasonic Sensors: Emit sound waves to detect objects.
- Optical Sensors: Use infrared or laser light.
3. Why Interface Proximity Sensors with Microcontrollers?
Interfacing proximity sensors with microcontrollers opens a world of possibilities:
- Real-time object detection.
- Enhanced automation.
- Scalable integration into embedded systems.
Real-world applications include smart homes, industrial automation, and robotics.
4. Components and Tools Required
- Hardware:
- Microcontroller (Arduino, PIC, STM32).
- Proximity sensor (choose based on your application).
- Breadboard, jumper wires, resistors.
- Software:
- Arduino IDE or compatible programming environment.
5. Step-by-Step Guide to Interfacing
Step 1: Understand Sensor Specifications
Check sensor voltage, range, and compatibility with the microcontroller.
Step 2: Wiring the Sensor
Connect the sensor’s power, ground, and signal pins to the appropriate microcontroller pins.
Table: Wiring Example
| Sensor Pin | Microcontroller Pin |
|---|---|
| VCC | 5V |
| GND | GND |
| Signal | Digital Pin 2 |
Step 3: Programming the Microcontroller
Write and upload the code to detect sensor signals. Use debounce techniques for accurate readings.
Step 4: Testing the Setup
Verify the setup using a multimeter or serial monitor.
Step 5: Debugging
Common issues include loose connections or incorrect code logic. Use step-by-step debugging.
6. Real-World Applications
- Industrial Automation: Detecting parts on conveyor belts.
- Robotics: Collision avoidance and navigation. Learn how microcontrollers power robots by exploring our guide on building a robot with microcontrollers.
- Smart Homes: Automatic light control.
7. Advanced Topics
- Multiple Sensor Integration: Combine multiple sensors for complex tasks like 3D mapping.
- Wireless Proximity Sensing: Use Bluetooth or Wi-Fi modules to make the setup wireless.
Dive deeper into hardware integration with our article comparing VLSI design and embedded systems.
Table: Sensor Comparison
| Sensor Type | Detection Range | Applications |
| Inductive | 0-5 mm | Metal detection |
| Capacitive | 0-10 mm | Object detection |
| Ultrasonic | Up to 5 meters | Distance sensing |
| Optical | Varies | Light-based tasks |
Conclusion
Proximity sensor interfacing with microcontrollers is a gateway to innovative solutions in automation and robotics. By following this guide, you’re ready to build your projects with confidence. Start experimenting today and bring your ideas to life! Explore more tutorials and guides on our electronics blog.
Share your experiences in the comments or explore our advanced tutorials.